Installing CodeTogether Live in VS Code
If you want to host a CodeTogether Live session from VS Code, you’ll need to install the CodeTogether Live extension for VS Code. You can also join a session directly from VS Code with the extension installed.
Installing the CodeTogether Live Extension
CodeTogether Live requires VS Code 1.44 or higher. You have two options when installing the CodeTogether Live extension:
- Install via the VS Code marketplace listing.
- Download the VSIX file from the CodeTogether Live download page and add the file in VS Code.
If using a proxy network, see VS Code Proxy Troubleshooting for additional instructions.
Installing the VSIX file in VS Code
If you choose to download the VSIX file, complete these steps to add the CodeTogether Live extension to Visual Studio Code.
In VS Code, select View > Extensions.
Click the command drop-down [. . .] and select Install from VSIX, or select Extensions: Install from VSIX from the Command Palette.
Select the downloaded .vsix file and click Install. A notification displays when installation is complete.
Start collaborating!
Trusted Workspaces
VS Code recently introduced the concept of Workspace Trust. While CodeTogether Live functions fine even if the workspace is not trusted, it may be annoying to repeatedly see the “untrusted workspace” message when joining sessions using a VS Code client. CodeTogether Live will suggest adding the ~/.codetogether/vscode folder to the Trusted Folders and Workspaces list.

Getting Started
After adding the CodeTogether Live extension to your VS Code, it’s simple to host or join a pair programming session. For more information, see the Getting Started Guide.
If you have a CodeTogether Teams plan, see Using CodeTogether Teams for details on how to host sessions and invite participants.
Hosting a Session from VS Code
Click Host New Session from the CodeTogether view. Alternatively, you can use the CodeTogether: Start Hosting Session command or click CodeTogether in the status bar and select Start Hosting Session.

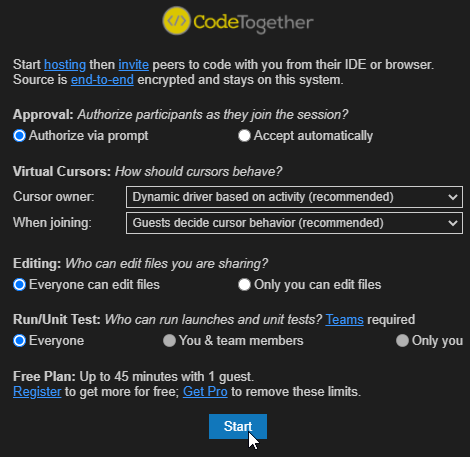
Answer questions related to participant access when prompted, and then click Start. The Invite URL is automatically copied to the clipboard when the session is started.
 note
noteTo obtain the URL later, you can click Invite Others from the Hosting node in the CodeTogether view, use the CodeTogether: Copy Invite URL command, or click In Session in the status bar and select Copy Session URL to Clipboard.
Share the link with anyone you would like to code with.
Joining a Session from VS Code
Click Join Remote Session from the CodeTogether view. Alternatively, you can use the CodeTogether: Join Remote Hosting Session command or click CodeTogether in the status bar and select Join Remote Session.

Paste the Invite URL and press Enter.

If the host selected to let you choose your cursor behavior, select to Share a Cursor or Your Own Cursor, and then click Join Now once the session is ready.
